For many years, the Microsoft .NET platform was associated primarily as an environment for creating applications for Windows operating system. A lot has changed since then, mainly due to the release of the .NET Core 1.0 framework in 2016, which provided support for Windows, Linux and macOS. It is worth mentioning that it was also possible to run .NET applications on platforms other than Windows using the Mono open-source project back in 2004.
In this article, I will present two interesting options for utilizing the possibilities of the .NET platform on Raspberry Pi microcomputers: the use of the .NET runtime environment in a Linux system as well as a special edition of Windows 10 – IoT Core.
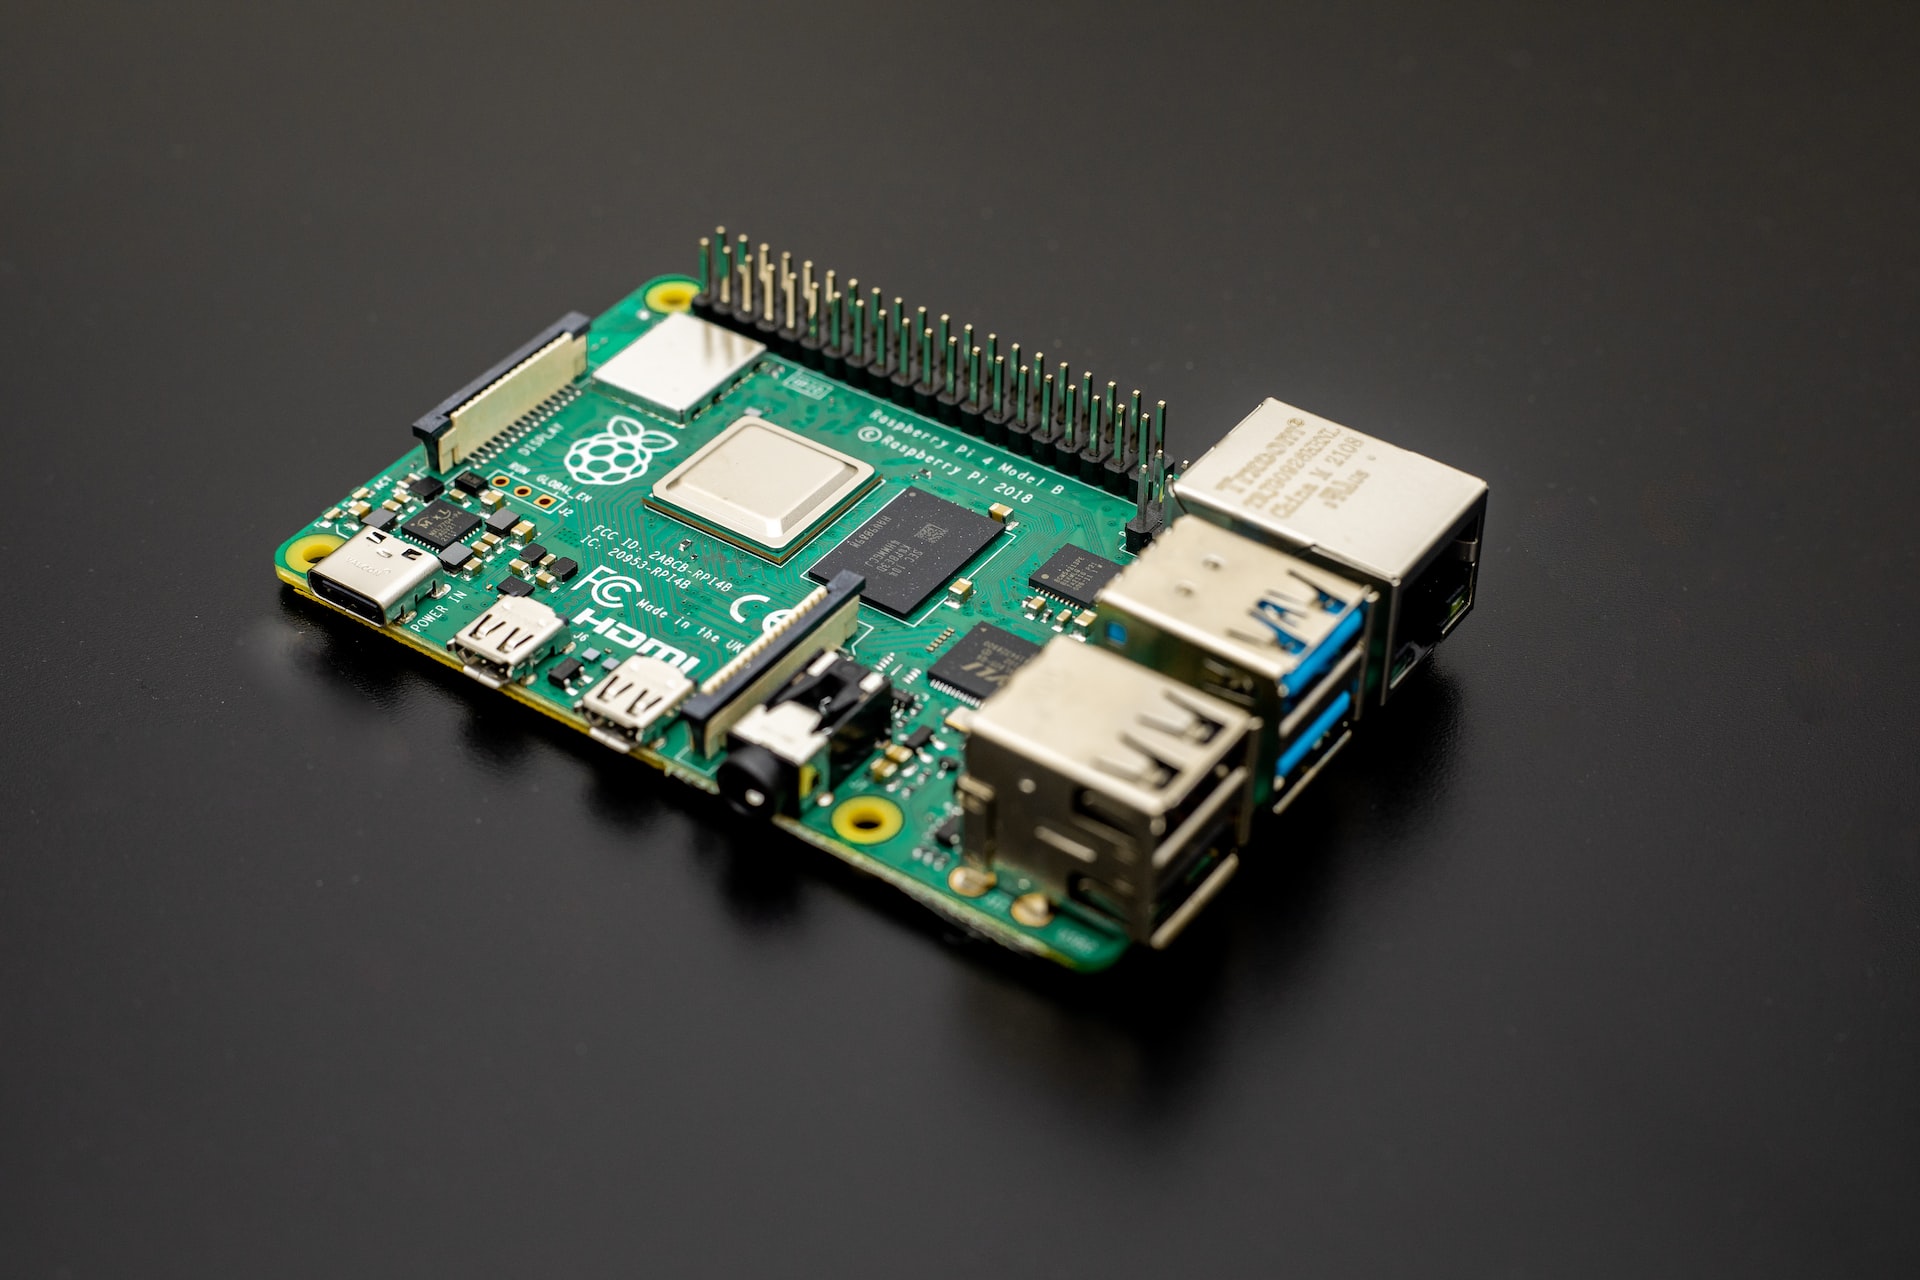
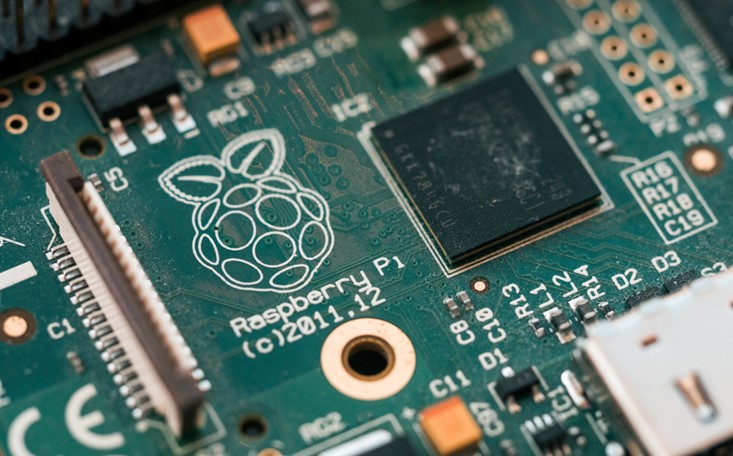
Raspberry Pi is a family of microcomputers created by the Raspberry Pi Foundation for learning purposes related to broadly understood computer science. Since the release of the first version of the devices in 2012, it has been widely used for science and hobby purposes in various types of projects, including IoT (Internet of Things).
The Raspberry Pi 3B will be used to test the capabilities of the .NET platform, as it currently provides the widest range of options. This may change in the future if new Raspberry versions provide support for other tools/system versions presented in this article. Right next to each option, I will provide information on compatibility with other Raspberry versions.
In addition, our hardware configuration will also need three contact wires and one 4.7kΩ resistor. Detailed instructions for this configuration can be found at this address: instructions for connecting DS18B20 to Raspberry Pi.
.NET/ .NET Core Runtime on Linux
The most obvious way to use the .NET platform on Linux is to use the version of the runtime that it supports. In the case of Raspberry Pi, we can just use .NET Runtime. After installing and configuring the environment we will be able to run applications written in
- C#,
- F#,
- Visual Basic.
.NET Core has provided support for the ARM architecture (more precisely, ARM32) since version 2.0 was released in 2017. This allowed not only to create of applications for previously supported platforms, such as personal computers, servers or other devices within the Windows ecosystem but also on devices such as Raspberry Pi.
Before taking any further steps, you must install the official operating system for Raspberry, which is Raspbian. The installation instructions are on the official website of the project. The next step is to configure the equipment to support the temperature sensor.
.NET Runtime framework installation
Let’s start by installing the .NET Runtime framework on the Raspberry Pi. To do this, execute the sequence of commands below from the system terminal:
- curl -sSL https://dot.net/v1/dotnet-install.sh | bash /dev/stdin –channel Current
- echo ‘export DOTNET_ROOT=$HOME/.dotnet’ >> ~/.bashrc
- echo ‘export PATH=$PATH:$HOME/.dotnet’ >> ~/.bashrc
- source ~/.bashrc
- dotnet –version
The result of the last command in the case of a correct installation should be the currently installed .NET version – in my case it is 6.0.401.

Create a console application
The next step is to create a console application and install the necessary packages:
- dotnet new console -o RaspberryTemperature
- cd RaspberryTemperature
- dotnet add package Iot.Device.Bindings
- dotnet add package CsvHelper
- dotnet add package Newtonsoft.Json
To check if newly created application works correctly, we can run it using the command:
- dotnet run RaspberryTemperature.csproj

After successful startup, you should see “Hello, World” in the terminal.
Preparation of a sample program
For the purposes of showing the possibility of using the .NET platform, I created a simple program for reading the temperature from the popular DS18B20 digital temperature sensor. It can be one of the elements of a simple home automation system, for which many enthusiasts use equipment such as Raspberry.
Now open the Program.cs file with a text editor of your choice (in my case it is Visual Studio Code also available on Raspberry) and paste the source code from the repository. Below is the most interesting fragment, showing the temperature reading from the sensor.
//Reading temperature from DS18B20 sensor
var sensor = OneWireThermometerDevice.EnumerateDevices().FirstOrDefault();
var temperature = sensor?.ReadTemperature() ?? new UnitsNet.Temperature();
Console.WriteLine($"Current temperature: {temperature.DegreesCelsius.ToString("F3")}\u00B0C");
Launching the console application
We can now proceed to run our console application:
- dotnet run RaspberryTemperature.csproj
In the case of the correct configuration of the environment and hardware, we should see a similar view:

Our application first reads previous temperature measurements from the file (if any) and displays the last one, then reads the current temperature from the sensor and displays it for the user. The result is then saved to a file and sent via an HTTP query to the indicated address (in our case, it is only a URL that allows you to check whether the query was actually successful and what was its content).
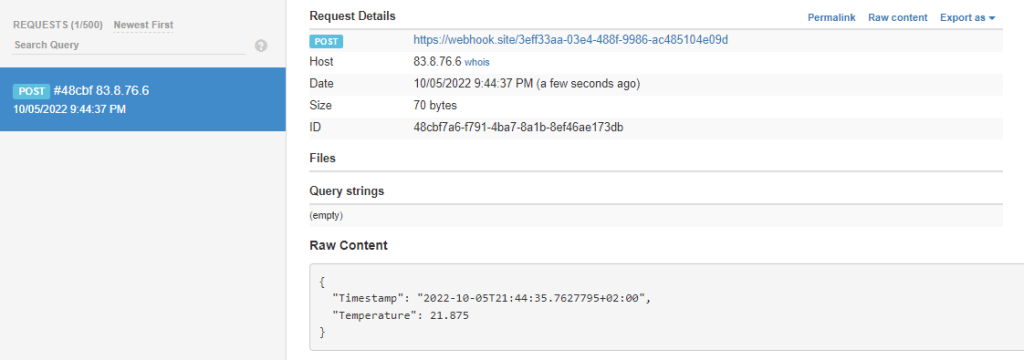
This simple application was intended to show that the .NET platform on Raspberry Pi provides support for basic functionalities that we may want to use on hardware of this class, such as communication with sensors via GPIO, writing and reading in the file system or network communication.
Practical information and limitations
The most important information about the limitations of using .NET on Raspberry is compatibility: .NET Core from version 2.0 up and .NET from 5.0 up is supported. Due to the limitations of the architecture, only ARM32v7 is supported at the moment, which is used on the following devices:
- Raspberry Pi 2,
- Raspberry Pi 3,
- Raspberry Pi 4,
- Raspberry Pi Zero 2W.
Currently, it is only possible to develop console and web applications using ASP.NET Core. There is no support for Linux desktop apps at this point (although this may be possible in the future by the MAUI project).
Due to the rather unusual use case that is .NET on Raspberry, we can encounter the situation when some peripherals are not supported in the form of ready-to-use libraries. However, we have the option of using the basic available communication interfaces, such as
- GPIO,
- I2C, SPI,
- UART,
which opens the way to create such libraries yourself if necessary.
Windows 10 IoT Core
The second option to run .NET applications on the Raspberry is to install a dedicated edition of Windows for IoT devices – Windows 10 IoT Core. This edition is a successor of Windows Embedded and was first made available in 2015. It allows you to run UWP (Universal Windows Platform) applications on devices such as Raspberry Pi or other selected microcomputers.
Installation and configuration
Installing Windows 10 IoT Core is no problem. For this purpose, a special Windows 10 IoT Core Dashboard application was created, thanks to which we can easily install the system, view and configure current connected devices, as well as upload available sample applications to test the system’s capabilities. Installation instructions can be found on Microsoft’s page.
To be able to create a UWP application we must have a development environment that allows you to create this type of project, such as Visual Studio (from version 2015 and up). When installing, we must ensure that the following option is marked:
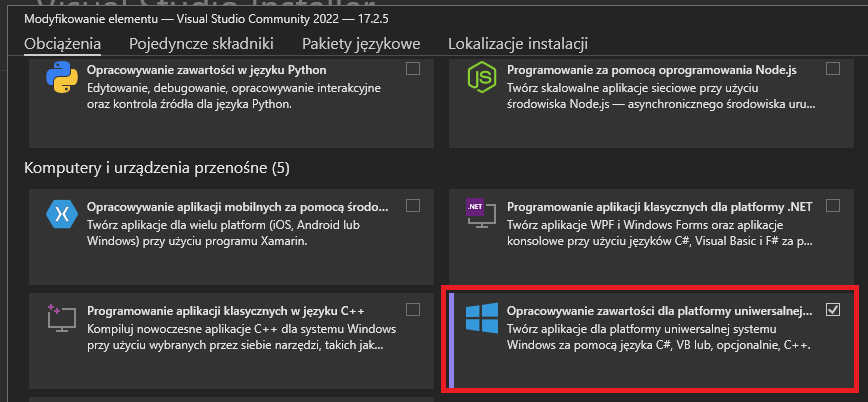
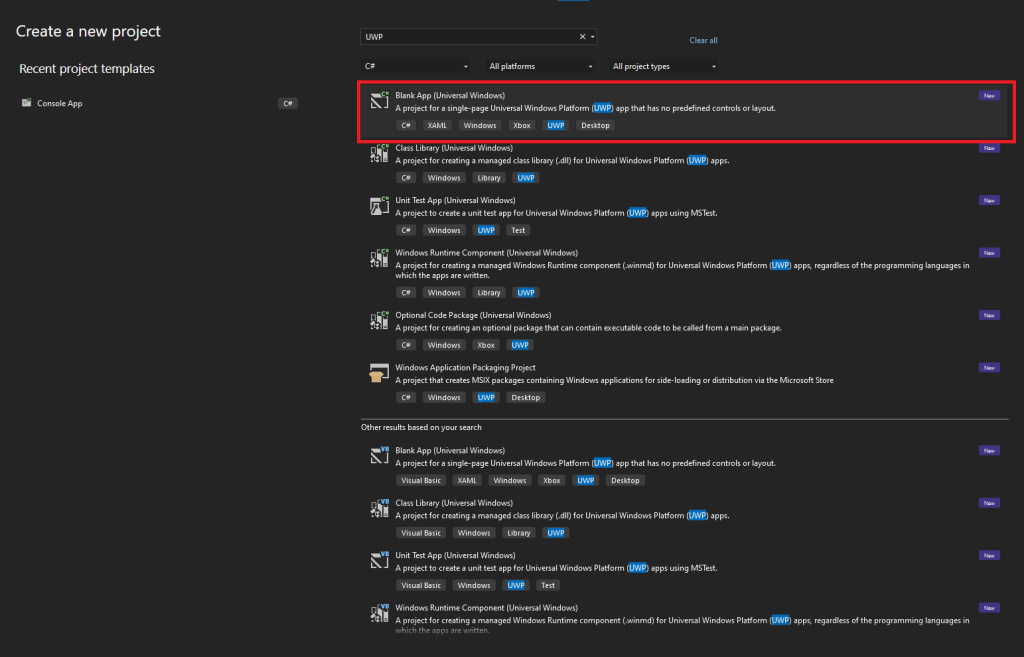
After successfully installing the necessary components, we proceed to create a new project, choosing Blank App (Universal Windows) from the available options.
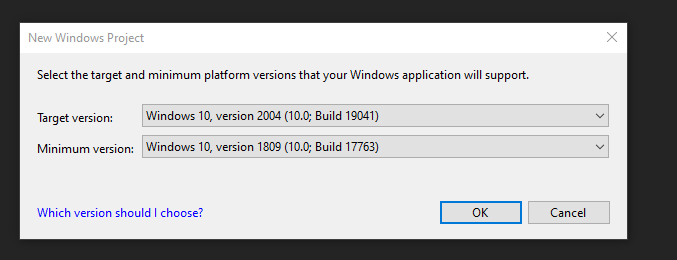
In the next step, the project wizard will ask us to select the version of the system that we want to support – the choice should be matched to the version of the system installed in the previous steps on the Raspberry.
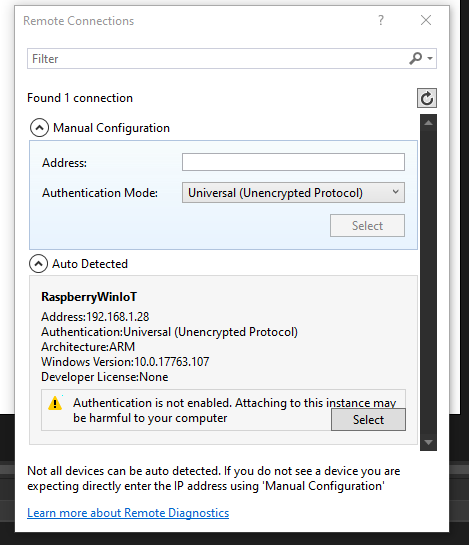
After completing the project creation process, we have access to a new UWP application with a graphical interface. We can proceed to upload the application and run it on our Raspberry. To do this, select “ARM” as the solution architecture and “Remote Machine” as the environment. We should see a dialog box with the option of selecting a device – if the Raspberry is properly configured and in the same network as our computer, it should appear as one of the options to choose from. After selecting the device, we can proceed to upload the application to our microcomputer. The first installation may take longer due to the need to upload and install the necessary libraries and packages.
The effect of running the application on the Raspberry should be a blank screen displayed on the screen connected to the microcomputer (in place of the previously visible information about the system).
Sample application on Windows 10 IoT Core
For the purpose of demonstrating the capabilities of Windows 10 IoT Core, we will use the UWP application with a graphical interface, where we will place a slightly modified source code from the previous example for Linux. The full source code is available in the repository.
After launching the application on the remote device and connecting the display to it, we should see the following view:
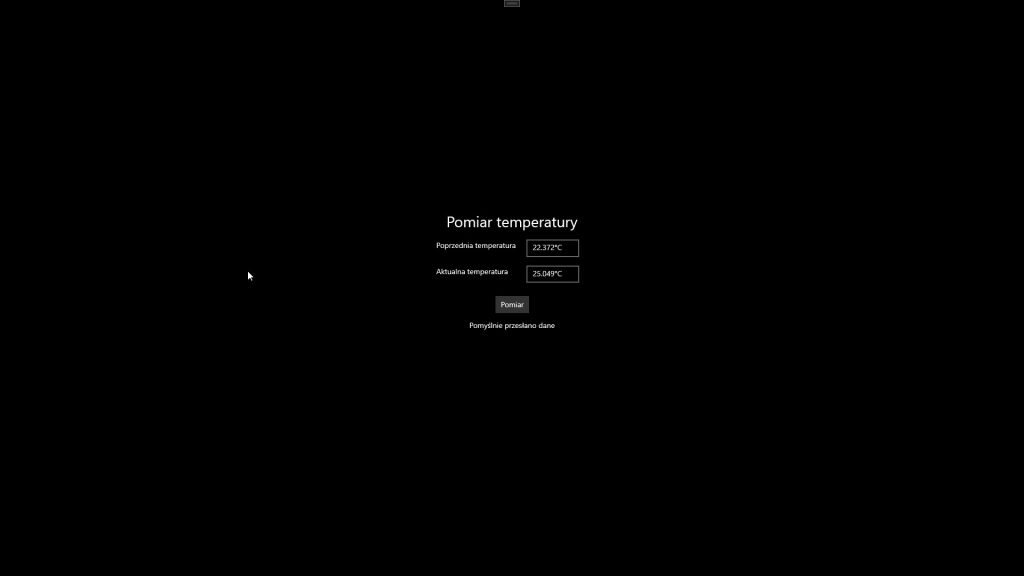
Pressing the “Pomiar” button loads the last temperature measurement from the file, reads the current temperature state, saves the result to the file and sends an HTTP request, as in the case of our first console application. The difference lies in the use of a pseudo-random number generator for reasons that I will present in the summary for this version of the system.
Practical information and limitations
Windows 10 for IoT supports only the creation of applications in the UWP model, which is quite a significant limitation when it comes to the possibilities of using libraries and frameworks. However, we can create both console applications (which can run in the background in the so-called headless mode) as well as these with a graphical user interface.
It is worth mentioning that there are two versions of Windows 10 for IoT – IoT Core and IoT Enterprise. This second version, in addition to extended support provided and other benefits similar to the Windows Enterprise edition, allows you to run the entire spectrum of Windows applications (Windows Forms, UWP, etc.) but does not support the ARM architecture, which in our case excludes it from being used on the Raspberry Pi.
The list of devices from the Raspberry family supported by IoT Core is basically limited to the following models:
- Raspberry Pi 2,
- Raspberry Pi 3B,
- Raspberry Pi 3B+ (only in the Technical Preview version).
Microcomputers from other manufacturers are also supported, but the list is not particularly long.
A big advantage of developing and testing .NET applications on Windows 10 IoT Core is great integration with Visual Studio, which allows us to easily upload, run and debug our applications from the IDE level.
The DS18B20 sensor is not directly supported in Windows 10 IoT Core. The library itself to support it (available in the Iot.Device.OneWire package) is available, but it does not work in this configuration. I will not discuss the exact reasons for the lack of support for this sensor, but I refer you to possible ways to go around this problem: the use of the UART protocol and OneWire bridges.
Bonus: Windows 10 ARM
The last option of using the .NET platform that I would like to present as a curiosity is … the use of a full-fledged version of Windows 10 on Raspberry Pi. It is possible to install a version of the system for the ARM architecture and use it on a microcomputer. In this case, we can run applications not only compiled specifically for this architecture, but also for the x86 architecture using the emulation layer built into the system.
The easiest way to install Windows 10 ARM is to use the “Windows on Raspberry” project, detailed instructions on how to do it step by step can be found at this address: Windows on Raspberry.
However, I have refrained from discussing this method in detail because of its “unofficial” nature. Although the installed images of the system come from Microsoft itself, and the authors of the project inform that it is fully legal provided that you have the appropriate licenses for Windows, it is not (yet) an officially supported option. However, it is worth being aware that such a possibility exists. For those interested in how such a system behaves on such simple hardware as Raspberry, there are videos on YouTube showing Windows 10 on Raspberry Pi.
Summary
To sum up all the above experiments, we checked two possible ways to use the .NET platform on Raspberry Pi – running .NET applications on Linux and on a special version of Windows – Windows 10 IoT Core. Each of these options has different support for .NET functionality, supported hardware and peripherals, type of applications that can be run, and overall platform support.
In terms of usability, by far the most explored option for working with .NET on Raspberry is to use the platform’s native Linux support. This possibility has been supported for a long time, each subsequent version of the platform is compatible with both Linux and Linux and ARM architecture (.NET 6 also offers support for ARM64). Installation and configuration are seamless, as is the use of the application as well as a lot of support for external peripherals such as sensors, through the implementation of protocols used by the IoT. Thanks to the possibility of creating web applications, we can also use our microcomputer as a server.
Windows 10 IoT Core seems to be an interesting, but definitely less future-proof option. A definite advantage is the ability to create UWP applications with a graphical interface, as well as very developer-friendly integration with development tools.
Unfortunately, this version of the system will no longer receive new functionalities, which the Enterprise version will receive instead. The UWP platform itself has also suffered the same fate, it will only receive bug fixes and stability improvements. However, this option may be of interest in some use cases that involve the use of .NET applications with a graphical user interface.

